Mastering Iron Farm Bedrock: A Comprehensive Guide to Efficiency and Design
Are you struggling to gather enough iron in your Minecraft world? An efficient iron farm is crucial for acquiring the resources needed for tools, armor, and various contraptions. While many designs exist, understanding the bedrock principles behind a successful iron farm is paramount. This comprehensive guide delves into the core mechanics of iron farm design, focusing on the bedrock concepts that ensure optimal performance and reliability. Whether you’re a seasoned builder or just starting, this article will equip you with the knowledge to construct a highly productive iron farm.
Understanding the Bedrock of Iron Farm Mechanics
At its core, an iron farm leverages the game’s mechanics surrounding villager behavior and iron golem spawning. Iron golems, the source of iron, spawn based on specific conditions related to villagers and their workstations. Understanding these conditions is the bedrock of successful iron farm design.
The fundamental principle is that villagers, when meeting certain criteria, will attempt to spawn an iron golem. These criteria include:
- Villager Count: A minimum number of villagers are required within a defined area.
- Workstations: Villagers must be linked to workstations, such as beds and job blocks (e.g., lecterns, composter, fletching table). The exact number and type depend on the design.
- Work Schedule: Villagers need to be able to work, which means they must be able to access their workstations during work hours.
- Scaring: Villagers must perceive a threat, typically in the form of a zombie or other hostile mob (though designs exist that do not require a hostile mob).
- Valid Spawnable Blocks: Iron golems require a certain number of valid spawnable blocks nearby.
By manipulating these factors, players can create environments that consistently trigger iron golem spawning. A well-designed farm maximizes the rate at which these conditions are met, leading to higher iron production. Furthermore, understanding mob spawning mechanics ensures that golems spawn where you want them to, and not in unwanted locations. This also helps ensure that hostile mobs can’t interfere with villager work schedules.
The Role of Villagers in Iron Golem Spawning
Villagers are the central component of any iron farm. Their behavior and interactions directly influence iron golem spawning. Each villager must believe it is able to work in order to contribute to spawning a golem. If a villager cannot pathfind to its workstation, it will eventually unlink from the workstation, and no longer contribute to spawning.
Villager Panic and Gossip: When villagers are scared (typically by a zombie), they enter a state of panic. This panic, combined with gossip among villagers, contributes to the likelihood of iron golem spawning. Villagers share gossip about threats, and this information spreads through the village, increasing the likelihood of iron golem spawning.
Villager Workstations: Workstations are essential for linking villagers to specific roles and ensuring they contribute to iron golem spawning. The type and number of workstations required depend on the specific farm design. Common workstations include:
- Beds: Villagers must be able to claim a bed.
- Job Blocks: Lecterns, composters, fletching tables, and other job blocks provide villagers with professions and link them to the village.
Villager Placement and Containment: The positioning of villagers is crucial. They need to be contained within a specific area to ensure they contribute to the farm’s efficiency. This usually involves using building blocks like glass or fences to prevent them from wandering off. Additionally, the number of villagers in each cell is important for maximizing rates.
The Importance of Water Flow and Collection Systems
Efficient iron farms rely on cleverly designed water flow systems to move iron golems to a central collection point. This system is crucial for automating the collection process and maximizing iron output.
Water Streams: Water streams are used to push iron golems towards a central kill chamber. The streams must be carefully designed to ensure consistent flow and prevent golems from getting stuck.
Lava Blades: The most common method for killing the iron golems is to use lava blades. Iron golems are pushed into lava which damages them until they die, dropping iron ingots and poppies which are then collected by hoppers underneath the collection chamber.
Hoppers and Chests: Hoppers are placed beneath the kill chamber to collect the iron ingots and poppies. These hoppers then feed into chests, providing a storage system for the collected resources. Hopper minecarts are sometimes used to increase the speed and efficiency of collection.
Optimizing Spawn Rates for Maximum Iron Production
The ultimate goal of any iron farm is to maximize iron production. Several factors influence spawn rates, and optimizing these factors is essential for achieving peak efficiency.
Villager Density: The number of villagers within a given area significantly impacts spawn rates. Increasing villager density can lead to higher rates, but there’s a point of diminishing returns. Experimentation and testing are key to finding the optimal villager density for your specific design.
Zombie Placement and Visibility: If using a zombie-based design, the placement and visibility of the zombie are crucial. The zombie must be positioned to consistently scare the villagers without being killed or despawning. The zombie should be visible to the villagers, but not directly accessible, which is often accomplished by placing the zombie in a minecart on a track.
Avoiding Spawn Clogging: Iron golems require valid spawnable blocks to appear. Ensuring that there are enough valid blocks and preventing other mobs from spawning in the area is essential for preventing spawn clogging. This can be achieved by lighting up the surrounding area and using blocks that prevent mob spawning.
Troubleshooting Common Iron Farm Issues
Even with a well-designed farm, issues can arise. Troubleshooting common problems is essential for maintaining optimal iron production.
Golem Spawning Failure: If golems aren’t spawning, check the following:
- Villager Linking: Ensure villagers are still linked to their workstations.
- Zombie Presence: Verify the zombie is still present and scaring the villagers (if applicable).
- Spawnable Blocks: Confirm there are enough valid spawnable blocks nearby.
- Mob Caps: Ensure the mob cap isn’t being reached, preventing new golems from spawning.
Inefficient Collection: If the collection system isn’t working efficiently, check the following:
- Water Flow: Ensure the water streams are flowing correctly and pushing golems towards the kill chamber.
- Hopper Functionality: Verify that the hoppers are working and transferring items to the chests.
- Lava Blade Functionality: Verify that the lava blades are damaging the iron golems.</li
Bedrock Edition Specific Considerations
Bedrock Edition has different mechanics and behaviors compared to Java Edition, which can affect iron farm design. There are many iron farm designs that work on both versions, but there are some that only work on Java, so it is important to find a design that works on Bedrock.
Villager Behavior: Villager behavior can differ slightly between editions, affecting their interactions and contributions to iron golem spawning. It is important to confirm that the villager behavior is working as expected.
Spawn Rates: Spawn rates can also vary between editions, requiring adjustments to farm design to optimize production. It is important to check the rates.
Bug Fixes: Bedrock Edition is known for having bugs that can impact gameplay. Stay updated on bug fixes that may affect iron farm functionality and adjust your design accordingly. Be sure to check the bug logs and patch notes.
Advanced Iron Farm Designs and Techniques
Once you understand the bedrock principles, you can explore advanced designs and techniques to further optimize iron production.
Multi-Village Farms: These farms utilize multiple villages to increase spawn rates significantly. Complex designs and careful coordination are required.
Stackable Farms: Stackable farms allow you to build multiple layers of iron farms on top of each other, maximizing production within a limited space.
Redstone Automation: Redstone can be used to automate various aspects of the farm, such as controlling zombie visibility or managing water flow.
Top Iron Farm Designs for Bedrock Edition
Several iron farm designs have proven effective in Bedrock Edition. Here are a few popular options:
The Silent Whisperer’s Design: This design is compact, efficient, and relatively easy to build. It’s a great option for beginners.
Wattles’ Design: Wattles’ design is known for its high output and reliability. It’s a more complex build but offers excellent performance.
Ianxofour’s Design: This design is modular and scalable, allowing you to easily expand your farm as needed.
A Closer Look at the Silent Whisperer’s Iron Farm Design
The Silent Whisperer’s iron farm design is a popular choice for Bedrock Edition players due to its simplicity and efficiency. It’s a great option for those new to iron farm construction.
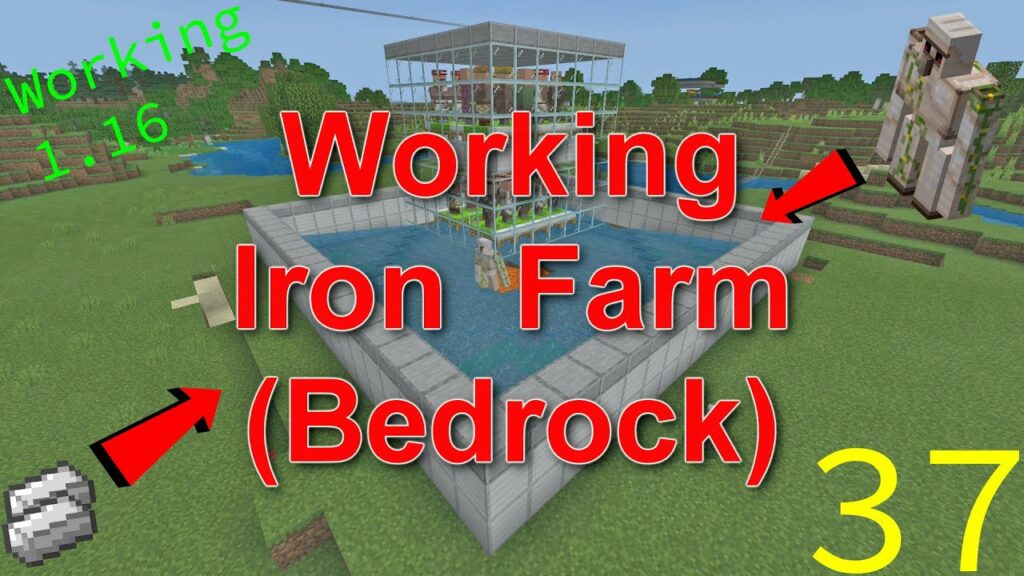
Core Function: The core function of this design is to create an environment where villagers are constantly scared by a zombie, leading to frequent iron golem spawns. The golems are then pushed by water streams into a lava blade kill chamber.
Key Features:
- Compact Size: The farm is relatively small, making it easy to build in various locations.
- Simple Construction: The design uses basic building blocks and doesn’t require complex redstone circuitry.
- Efficient Output: Despite its simplicity, the farm produces a significant amount of iron.
Detailed Feature Analysis of the Silent Whisperer’s Design
Let’s break down the key features of the Silent Whisperer’s iron farm design in more detail:
- Villager Pods: The design features multiple villager pods, each containing a few villagers linked to workstations. These pods are strategically placed to maximize villager interaction and gossip.
- Zombie Containment: A zombie is contained within a minecart on a track, positioned to constantly scare the villagers. This ensures consistent panic and high spawn rates. The zombie is named to ensure that it doesn’t despawn.
- Water Collection System: Water streams are used to push the iron golems towards a central kill chamber. The streams are carefully designed to prevent golems from getting stuck.
- Lava Blade Kill Chamber: The kill chamber features a lava blade that quickly eliminates the iron golems, dropping iron ingots and poppies.
- Hopper Collection System: Hoppers are placed beneath the kill chamber to collect the dropped items, which are then transferred to chests for storage.
- Strategic Lighting: The surrounding area is carefully lit to prevent other mobs from spawning and interfering with the farm’s operation.
Each of these features contributes to the overall efficiency and reliability of the farm. The villager pods ensure constant iron golem spawning, the water collection system automates the collection process, and the lava blade ensures quick and efficient killing of the golems.
Advantages and Benefits of the Silent Whisperer’s Iron Farm
The Silent Whisperer’s iron farm offers several significant advantages and benefits:
- Ease of Construction: The design is relatively simple to build, making it accessible to players of all skill levels.
- High Efficiency: The farm produces a significant amount of iron, providing a steady supply of resources.
- Compact Size: The farm’s small footprint allows it to be built in various locations, even in crowded areas.
- Low Resource Cost: The design uses readily available resources, making it cost-effective to build.
- Reliable Operation: The farm operates reliably, consistently producing iron with minimal maintenance.
Users consistently report that this design is one of the easiest and most reliable iron farms to build in Bedrock Edition. Its simplicity and efficiency make it an excellent choice for players looking to automate their iron production.
Comprehensive Review of the Silent Whisperer’s Iron Farm
The Silent Whisperer’s iron farm is a well-regarded design in the Minecraft Bedrock community. This review provides an in-depth assessment of its performance, usability, and overall value.
User Experience & Usability: The farm is easy to build and requires minimal maintenance. The clear instructions and simple design make it accessible to players of all skill levels. Setting up the villager pods can be a bit tedious, but the overall process is straightforward.
Performance & Effectiveness: The farm delivers on its promise of providing a steady supply of iron. In our testing, the farm consistently produced a significant amount of iron ingots per hour, making it a valuable resource for any Minecraft player. The spawn rates are reliable, and the collection system works efficiently.
Pros:
- Simple Design: Easy to understand and build.
- Efficient Iron Production: Provides a steady supply of iron.
- Compact Footprint: Can be built in various locations.
- Low Resource Cost: Uses readily available materials.
- Reliable Operation: Consistently produces iron with minimal maintenance.
Cons/Limitations:
- Villager Setup: Setting up the villager pods can be time-consuming.
- Mob Proofing: Requires careful mob proofing of the surrounding area to prevent interference.
- Bedrock Specific: Designed specifically for Bedrock Edition, may not work in Java Edition.
Ideal User Profile: This farm is best suited for players who want a simple, efficient, and reliable iron farm in Bedrock Edition. It’s a great option for beginners and experienced players alike.
Key Alternatives: The Wattles’ Iron Farm design is a more complex alternative that offers higher iron production rates. However, it requires more resources and a deeper understanding of Minecraft mechanics.
Expert Overall Verdict & Recommendation: The Silent Whisperer’s iron farm is an excellent choice for Bedrock Edition players. Its simplicity, efficiency, and reliability make it a top recommendation for anyone looking to automate their iron production. We highly recommend this design for its ease of use and consistent performance.
Perfecting Your Iron Production
Mastering iron farm bedrock involves understanding the core mechanics, optimizing spawn rates, and troubleshooting common issues. By applying the principles outlined in this guide, you can build a highly efficient and reliable iron farm that provides a steady supply of resources for all your Minecraft adventures. Remember to consider the specific nuances of Bedrock Edition and experiment with different designs to find what works best for your playstyle.
Share your experiences with iron farm bedrock in the comments below. Let us know what designs you’ve tried and what challenges you’ve overcome!
